
Affiliate disclosure: Some links in this post are affiliate links, which means I may earn a small commission if you make a purchase — at no extra cost to you. I only recommend products I genuinely think can help, because this household runs on systems, not random stuff we hope will magically organize itself.
The Household Intake System is the process. The Incoming Zone is the physical place that makes that process easier to follow.
An incoming zone is a small, intentional area near an entry point where mail, packages, bags, returns, papers, and everyday items can land temporarily before moving to their next destination.
It may be an entryway table, a mudroom shelf, a kitchen counter, a wall beside the garage door, or even one basket near the door. The location matters less than the function: incoming items need a place to land, a way to be sorted, and a clear path forward.
Think of an incoming zone as a traffic control point, not a parking lot.
The goal is not to create another storage area. The goal is to make the first few minutes of handling new items easier and more consistent.
If you want the complete process for handling items as they enter your home, read [the complete Household Intake System].
What Is an Incoming Zone?
An incoming zone is a designated area where newly arrived items can land briefly before they are processed, relocated, returned, recycled, or stored.
It may be used for:
- Packages
- Shopping bags
- Returns
- Items borrowed from someone else
- Papers that need attention
- Items that belong in another room
- Things that need to leave the house
A well-designed incoming zone is:
- Close to a commonly used entrance
- Easy for everyone in the household to understand
- Limited in size
- Simple to maintain
- Used for temporary processing rather than permanent storage
The zone does not need to be large or elaborate. In many homes, one tray, basket, shelf, or section of counter is enough.
Incoming Zone vs. Drop Zone
An incoming zone and a drop zone may share the same physical area, but they serve different functions.
A drop zone is generally where frequently used personal items land when people come home, such as:
- Keys
- Bags
- Shoes
- Jackets
- Backpacks
- Lunch containers
- Everyday-carry items
An incoming zone focuses on new items entering the household, such as:
- Packages
- Purchases
- Returns
- Paperwork
- Deliveries
- Items that need a decision or destination
The two can share the same physical space, especially in a small home, but it helps to understand the difference:
Drop zone = what you bring with you.
Incoming zone = what enters the household.
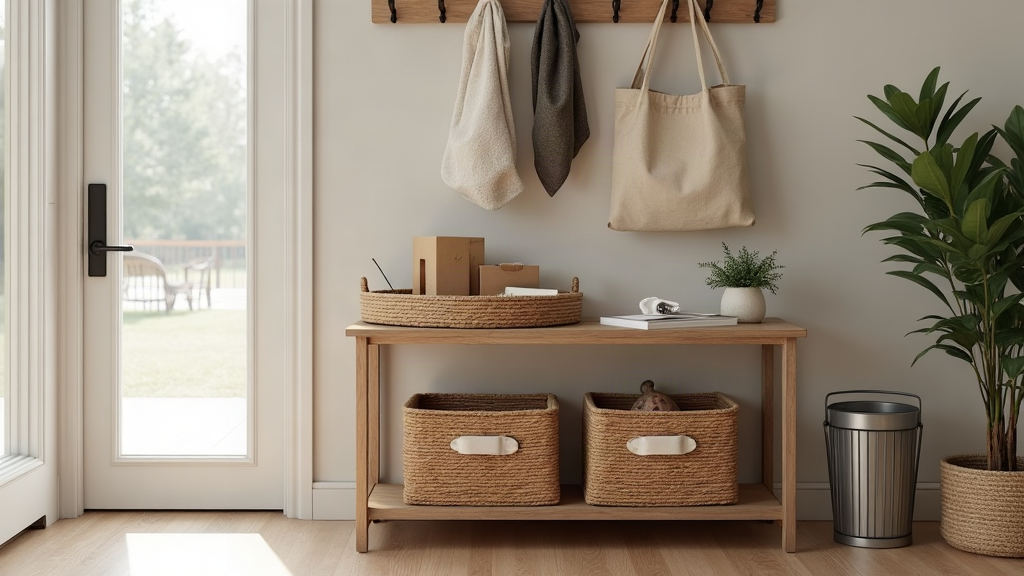
A combined entryway may include hooks and a shoe area for the drop zone, along with a tray, return basket, and package-processing area for the incoming zone.
Keeping these functions distinct prevents one area from becoming an undefined pile of everything.
Where Should an Incoming Zone Go?
The best incoming zone is located where items naturally enter your home. It does not have to be near the front door or in a traditional entryway.
Possible locations include:
- The main entryway
- A mudroom
- The garage entrance
- A back door
- A kitchen or utility-room entrance
- A home office for mail-heavy households
- A hallway shelf
- A wall beside the most-used door
- A small area near the stairs
Observe where items already land when people come home. That location often reveals the most practical place for the incoming zone.
A beautiful entryway setup will not work if everyone walks past it. Convenience matters more than appearance.
For personal items such as shoes, coats, and bags, see [the Shoe Organization System]. For family departures, school materials, and daily launch routines, a [Family Launch Pad or Back-to-School Command Center] may be a better supporting system.
Homes Without a Traditional Entryway
If your home does not have a defined entryway, use a small area near the entrance you use most often.
Possible solutions include:
- A narrow wall-mounted shelf
- A basket beside the door
- A small tray on a kitchen counter
- A rolling cart
- A compact console table
- A section of a bookcase
- A hook rail beside the garage door
The incoming zone can be small as long as it has clear boundaries and a defined purpose.
Choose the Right Type of Incoming Zone
Different households need different setups. Begin with the amount and type of incoming items your home regularly receives.
Small-Space Incoming Zone
A small-space setup may include:
- One wall-mounted basket
- A narrow tray
- A small return container
- Two or three hooks
- A nearby paper-recycling bin
Keep the number of categories low. A compact zone is easier to maintain when it does not require several containers.
Family Incoming Zone
A family setup may include:
- One landing area for packages
- Separate hooks or baskets for household members
- A return location
- A paper-sorting area
- A limit on how much each person can leave there
If several people use the zone, label only what is necessary. Too many labels or categories can make the system harder to use.
Package-Heavy Incoming Zone
Households that receive frequent deliveries may need:
- A package landing surface
- A return basket
- A recycling or box-flattening area
- A safe place for scissors or a box cutter
- A clear limit on unopened packages
The goal is to prevent delivery items from spreading across the entryway, kitchen, or dining table.
Mail-Focused Incoming Zone
If paper is the main source of clutter, focus on:
- A mail sorter
- A paper-processing tray
- A recycling bin
- A shredder or secure disposal location
- A calendar or reminder area for time-sensitive papers
Avoid creating a filing system inside the incoming zone. Filing is a later destination, not the primary function of the landing area.
For papers that need a longer-term decision, connect this area to your [Memory Stack System].
The Categories Your Zone Needs
Most incoming zones need only a few practical categories. Choose the ones that match your household’s actual routines.
To Process
This category is for items that need a decision or action, such as:
- Unopened mail
- New paperwork
- Packages that need to be opened
- Forms
- Items that need to be reviewed
To Return
Use this category for:
- Store returns
- Library books
- Borrowed items
- Packages that need to be shipped back
- Items that belong to someone else
To Relocate
This category is for items that belong elsewhere in the home but are not being put away immediately.
Keep this category limited. If it becomes a general household basket, it may turn into a collection point for unfinished tasks.
For the broader movement of items between household areas, see the [Zone Cleaning Method].
To Recycle or Discard
This category can hold:
- Junk mail
- Packaging
- Paper inserts
- Shipping materials
- Unwanted receipts
If possible, place the recycling container close enough that disposal is easy during the initial sorting process.
To Take Out
This category is for items leaving the home with the next person, trip, delivery, or errand.
Examples include:
- Outgoing mail
- Returns
- Donations
- Items to give to someone
- Work or school materials
How to Set Up an Incoming Zone
Step 1: Observe Where Items Already Land
For several days, notice where mail, bags, packages, and returns naturally collect.
Do not begin by purchasing containers. First identify the actual movement pattern in your home.
Ask:
- Which entrance do we use most often?
- Where do packages usually land?
- Where does mail accumulate?
- Where do returns get forgotten?
- Which surface is already convenient?
Step 2: Clear and Define the Area
Remove unrelated items from the chosen location.
Then define the boundaries of the incoming zone with one or more of the following:
- A tray
- A basket
- A shelf
- A drawer
- A section of counter
- A wall-mounted organizer
- A small console table
The physical boundary is important because it gives the zone a capacity limit.
Step 3: Add Only the Necessary Categories
Start with the categories your household uses most often.
A simple setup might include:
- One basket for items to process
- One container for returns
- One tray for papers
- One nearby recycling bin
You can add categories later if a recurring problem remains unresolved. Starting with too many containers can make the system feel complicated and discourage regular use.
Step 4: Place Supporting Tools Nearby
Keep frequently used tools within reach.
Helpful options may include:
- A mail sorter
- A return basket
- An open incoming basket
- An entryway tray
- A paper-recycling bin
- Wall hooks or a compact rail
- Scissors
- A box cutter stored safely away from children
The tools should support movement through the home. They should not encourage items to remain in the incoming zone indefinitely.
Step 5: Test the Setup for One Week
Use the incoming zone for one week before making major changes.
Notice:
- Which items still land somewhere else
- Which categories are confusing
- Whether the zone fills too quickly
- Whether the location is convenient
- Whether everyone knows what to do with incoming items
If items continue landing somewhere else, adjust the location or simplify the process.
Helpful Tools for an Incoming Zone
The right tools can make an incoming zone easier to use, but no specific product is required. Choose items that fit your space and support the types of items your household receives.
Every tool should make an existing action easier. The goal is not to buy a large collection of organizers.
Mail Sorter
A mail sorter can separate unopened mail, papers that need attention, and outgoing items.
Return Basket
A return basket gives purchases, borrowed items, and outgoing packages a visible temporary location.
Place it somewhere that will be seen before the next shopping trip, errand, or delivery pickup.
Open Incoming Basket
An open basket can hold items that have arrived but still need to be processed. An open design makes the contents visible and discourages forgotten piles.
Entryway Tray
A tray can define a small landing area for keys, receipts, papers, or other small items. Use it as a processing surface rather than a permanent storage container.
Paper-Recycling Bin
A nearby recycling bin makes it easier to discard unwanted paper during the initial sorting process.
Wall Hooks or Compact Rail
A simple compact entry rail with hooks can keep bags, jackets, reusable shopping bags, or outgoing items off the floor.
Create a Processing Limit
An incoming zone needs a physical limit. Without one, a temporary landing area can quietly become storage.
Possible limits include:
- One basket for unopened mail
- One tray for papers
- One return container
- One shelf for packages
- One designated counter section
When the zone reaches its limit, that is a signal to process what is there. The solution is not automatically a larger container.
Whenever possible, process incoming items within a day so the zone remains a temporary landing place rather than becoming a forgotten pile.
For the [four-step Household Intake System], see the complete method for handling incoming items from arrival through final placement.
A Simple Weekly Incoming-Zone Reset
A weekly reset helps keep the zone useful and prevents small delays from becoming clutter.
- Process remaining mail and papers
- Open or direct packages
- Place returns in the outgoing area
- Recycle packaging
- Return relocated items to their proper rooms
- Clear the tray or basket
- Remove anything that does not belong in the zone
- Check whether the setup still matches your household’s needs
The reset should be brief. If it regularly takes a long time, the zone may be too large, too complicated, or missing a clear destination.
Common Incoming-Zone Problems and Fixes
The Zone Becomes a Permanent Pile
Reduce the capacity of the zone and create clearer destinations for the items collecting there.
A smaller basket or tray can make the need for processing more visible.
Everyone Bypasses the Zone
Move it closer to the actual entrance or make it easier to use.
A convenient open basket is often more effective than a complicated sorting station.
There Are Too Many Categories
Combine categories until the system is easy to understand at a glance.
For example, you may be able to combine “to file” and “to review” into one “to process” category.
Packages Remain Unopened
Create a clear package limit and designate a regular time for opening and directing deliveries.
If packaging spreads throughout the house, add a nearby recycling or box-processing location.
Returns Are Forgotten
Use a visible return basket near the exit rather than hiding returns in a closet.
The basket should be easy to see when you are preparing to leave the house.
The Area Looks Cluttered
Reduce the number of containers and remove anything that is not directly involved in incoming-item processing.
An incoming zone should have a clear visual purpose. If it contains keys, toys, paperwork, shoes, mail, bags, and unrelated household items, it may be functioning as general storage rather than an intake area.
Conclusion
An incoming zone does not need to be large, expensive, or perfectly styled. It needs to be convenient, limited, and easy to understand.
Start with the place where items already collect. Add only the categories and tools your household genuinely needs, then create a regular habit of moving items onward.
When the physical landing area supports the process, new items are less likely to become forgotten piles.
The Household Intake System explains the complete process. The Incoming Zone provides the physical starting point that helps the process work in everyday life.
Read the complete method for handling incoming items in the Household Intake System.
This Framework Is Part of a Bigger System
The Incoming Zone is the physical front end of your Household Intake System—the place where mail, packages, returns, bags, and other “just came in” items get processed instead of scattered.
It connects to the larger SmartHomeDailyHub system:
- Household Intake System™ – The full process for catching, sorting, and directing what enters the home.
- Memory Stack™ – The tools that help your household remember where incoming items belong.
- Zone Cleaning™ – The reset method that keeps high-traffic spaces like entryways usable.
- Shoe Organization™ – A natural companion system for keeping the entryway from becoming a pile-up point.
- Routine Anchors™ – The habit triggers that make the incoming zone work automatically.
- Mental Load Reset™ – Because a working entryway reduces the number of things you have to remember.
Girlfriend Reality Check 💛:
You do not need a Pinterest-perfect foyer. You need a traffic-control point that keeps incoming stuff from taking over the house. Build the system, then let the entryway do its job.
📬 Join The Reset
Stop being the family “Google.” Join The Reset—my weekly coffee chat delivering one system to delete a mental tab. Subscribe Here.
Frequently Asked Questions
An incoming zone is a designated area near an entrance where mail, packages, bags, returns, and other new items can land temporarily before being processed or moved to their next destination.
No. It should be near the entrance where items actually enter your home. That may be a garage door, back door, mudroom, kitchen, or home office.
Use any convenient, limited area near your most-used entrance. A shelf, basket, tray, rolling cart, or small section of counter can function as an incoming zone.
A quick daily reset is helpful, with a more thorough weekly reset to process leftovers, remove unrelated items, and adjust the system if necessary.